Important Notice:
6/7/2020:
We're back. I'm still trying to re-figure/ streamline the Spice Selections to make it all more sensible to you and feasible to us. Truth is, y'all just don't use the spices and seasonings as much as I do (despite that, as with all spice & seasoning ingredients, they are best if used within a six month period and not after). That's understandable, but it makes having an online business impractical, is all. Over the course of many months I've been considering ways to make the spices more appealing to first time as well as repeat buyers. I've sought to solve several problems with the product, including:
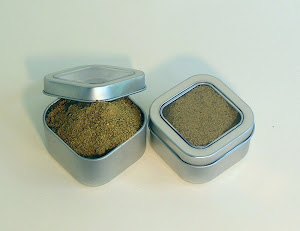
The tendency for the spice seasonings to clump - I've switched suppliers and am now using ingredients which are ground finer and have less tendency to clump. I've been satisfied with the results and I hope that you have as well.
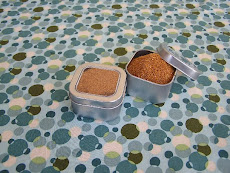
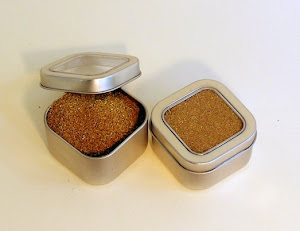
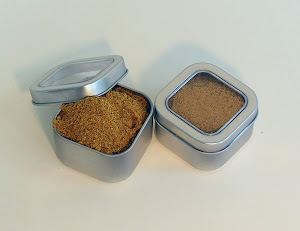
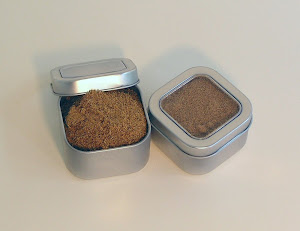
Packaging: The metal tins I'm using are, at best, a compromise in order to ship the spices as well as make them appealing and functional. When I initially started selling spices back in 2005, I was using 4 oz. glass jars. People really like the jars over the tins, and while the tins cost more, they are easier to ship without worrying that you will end up with a package of seasoned glass shards on your end.
Packaging #2: I have been considering losing the tins in favor of simple, functional, utilitarian plastic bags. Why? I have a lot of plastic bags in stock intended for refills of spices, and that just doesn't happen. If I switch to using the plastic bags, I could probably increase the amount of spice seasoning per order while decreasing the cost of each item as well as shipping. How about that?
Packaging #3: Wouldn't ya know, now they are saying that plastic is EVIL and DOES NOT LIKE YOU or YOUR FAMILY. Oh, plastic - we lived with so many hopes for you that must now go unfulfilled. It was sweet while it lasted.
Scrapping the catalog: That's right. Another serious consideration I've had for some time now is to scrap all of my current product and sell only certain items. What I have been selling over the past several years would essentially be retired. "What will you replace it with?", you ask? Well, let me tell you - I've been thinking of starting a whole new line of extremely hot and spicy seasonings and bbq rubs, so that I can rename it THE BURN WARD. That's right. I don't joke about such things. We're talking (or rather mumbling, since we've been steadily searing off the nerves on our tongues) serious Scoville Units here. What is your vote?
Spice of the Month Club: While it is still a serious consideration, it has never generated enough interest to convince me to do it. Maybe. Drop me a line and tell me you'd support it if I made it available. No, not just you, I mean some of those other people out there who haven't piped up yet.
Gift Sets: Of course - there will always be gift sets, as well as sales, like the ever popular buy 2 get 1 free deal.
Cost: Oy... one could make a living, if only they'd let you - ya know what I mean? Over the past 12 to 18 months, cost just got weird, particularly because import/ export costs that bear on the availability of ingredients for the spices and seasonings. I try to keep that old carbon foot print as small as possible - I've even considered binding my carbon foot to a child's size 2 - but there are certain ingredients that just are not easily available in our area of Western Massachusetts. Things like fresh Kaffir Lime Leaf and Lemongrass which, the last time I had to purchase a bulk of each I was told that I would need to pre-order it as it comes from places with sunnier climates, yet it is also affected by state restrictions which prevent growing these plants in proximity of delicate citrus agricultural regions. So - I temporarily stopped making the Green Thai Curry, which needs a good amount of each to get the flavor perfect. I know - it makes me sad, too, not to have my Green Thai Curry.
So that's the short of the long on the matter. Write me and let me know what your vote is on any or all of the intertwining topics.
And thanks for your support, your patience and your friendship - I really do appreciate it!
greetings - thanks for visiting my site!
newer new news...
Well, this is it. The spice store has made it's last gasp & is shutting down. Thanks for your support. If you have any requests or questions, please feel free to contact me.
Best regards to all,
Elliott
.:. .:. .:. .:. .:. .:. .:. .:. .:. .:. .:. .:. .:. .:. .:. .:. .:. .:. .:. .:. .:. .:.
6/7/2010:
We're back. I'm still trying to re-figure/ streamline the Spice Selections to make it all more sensible to you and feasible to us. Truth is, y'all just don't use the spices and seasonings as much as I do (despite that, as with all spice & seasoning ingredients, they are best if used within a six month period and not after). That's understandable, but it makes having an online business impractical, is all. Over the course of many months I've been considering ways to make the spices more appealing to first time as well as repeat buyers. I've sought to solve several problems with the product, including:
The tendency for the spice seasonings to clump - I've switched suppliers and am now using ingredients which are ground finer and have less tendency to clump. I've been satisfied with the results and I hope that you have as well.
Packaging: The metal tins I'm using are, at best, a compromise in order to ship the spices as well as make them appealing and functional. When I initially started selling spices back in 2005, I was using 4 oz. glass jars. People really like the jars over the tins, and while the tins cost more, they are easier to ship without worrying that you will end up with a package of seasoned glass shards on your end.
Packaging #2: I have been considering losing the tins in favor of simple, functional, utilitarian plastic bags. Why? I have a lot of plastic bags in stock intended for refills of spices, and that just doesn't happen. If I switch to using the plastic bags, I could probably increase the amount of spice seasoning per order while decreasing the cost of each item as well as shipping. How about that?
Packaging #3: Wouldn't ya know, now they are saying that plastic is EVIL and DOES NOT LIKE YOU or YOUR FAMILY. Oh, plastic - we lived with so many hopes for you that must now go unfulfilled. It was sweet while it lasted.
Scrapping the catalog: That's right. Another serious consideration I've had for some time now is to scrap all of my current product and sell only certain items. What I have been selling over the past several years would essentially be retired. "What will you replace it with?", you ask? Well, let me tell you - I've been thinking of starting a whole new line of extremely hot and spicy seasonings and bbq rubs, so that I can rename it THE BURN WARD. That's right. I don't joke about such things. We're talking (or rather mumbling, since we've been steadily searing off the nerves on our tongues) serious Scoville Units here. What is your vote?
Spice of the Month Club: While it is still a serious consideration, it has never generated enough interest to convince me to do it. Maybe. Drop me a line and tell me you'd support it if I made it available. No, not just you, I mean some of those other people out there who haven't piped up yet.
Gift Sets: Of course - there will always be gift sets, as well as sales, like the ever popular buy 2 get 1 free deal.
Cost: Oy... one could make a living, if only they'd let you - ya know what I mean? Over the past 12 to 18 months, cost just got weird, particularly because import/ export costs that bear on the availability of ingredients for the spices and seasonings. I try to keep that old carbon foot print as small as possible - I've even considered binding my carbon foot to a child's size 2 - but there are certain ingredients that just are not easily available in our area of Western Massachusetts. Things like fresh Kaffir Lime Leaf and Lemongrass which, the last time I had to purchase a bulk of each I was told that I would need to pre-order it as it comes from places with sunnier climates, yet it is also affected by state restrictions which prevent growing these plants in proximity of delicate citrus agricultural regions. So - I temporarily stopped making the Green Thai Curry, which needs a good amount of each to get the flavor perfect. I know - it makes me sad, too, not to have my Green Thai Curry.
So that's the short of the long on the matter. Write me and let me know what your vote is on any or all of the intertwining topics.
And thanks for your support, your patience and your friendship - I really do appreciate it!
------------------------------------------------------------
This blog is a companion site to my online business at emburke.etsy.com where I sell unique spice and seasoning blends. I will be featuring recipes that use the spice blends here, but you can easily adapt them to suit your own needs. Also, my spice and seasoning blends are interchangeable - you can easily use one blend in place of another to get a different creative result or you can play it safe and stick to the recipe.
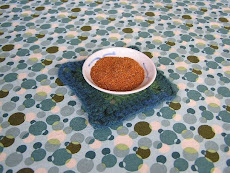
I have a variety of spice & seasoning blends available for purchase here - the perfect compliment for your meat & vegetarian entrées or side dishes. Each of my spice blends are made from fresh, organic spices purchased locally and are ground & blended by myself. They can be used as a dry or wet rub, as a marinade or sauce, or as a seasoning to add a little extra flavor.
Also, if you have any ideas, suggestions or challenges - send them on to me and I'll place them on the site as well.
Each quarter a portion of all sales from this site will be given to support a local charity in Western Massachusetts.
I think you will enjoy them as much as I do. Please spread the word!
Thanks, Elliott
P.S. - I'll have some other items available here in the near future.
------------------------------------------------------------
What would you like to find here?
Monday, June 7, 2010
Subscribe to:
Posts (Atom)
Read what some nice people have to say about my spices:"
Some mornings, I just stand in the kitchen alone and sniff Elliotts' spice. Then I'm somehow ready to start my day. And, oh yes, Elliott's spice IS great for cooking. Your eating habit will literally get "spiced up"."~ Tomoko Deeney (TADworks)
"I’ve almost never finished a full jar of spice and I’ve used several jars of Elliott’s spices in a matter of months. They are very unique and full of different flavors without being too salty or overpowering. They get my highest recommendation. Try them and you will love them."~ Keith Brisebois
"Elliott’s Green Thai is the most amazing spice... perfect for tacos, fish, chicken or beef. Once you’ve tried it, you won’t be able to cook without it!"~ Chrissie Henry
"I hadn't really explored the world of spices until this mixture somehow found its way into my cupboard. I had lived a fairly plain sea salt and cracked pepper food life, until this came along. I enjoy the 'kick' it has on my palate. And still the blend lends itself to good eatin'."~ Rachel Wilson
"Having a jar of Elliott's spice blends in my cupboard I feel as if I have been instantly transformed into a fantastic chef. Dishes I would normally feel intimidated to try - Curried Cauliflower, Tandori Chicken, Morrocan Lamb Stew - now feel within reach. Thank you, Elliott for opening up a whole world, literally, of fabulous food!"~ Alicia Pritt
"Filled a void in my life."~ Elizabeth (from Russia)